The goal of this project is to review the basics of object-oriented programming and to give you an initial try at designing an object-oriented system.
Your task is to build a program to emulate a four-function (addition, subtraction, multiplication, and division) calculator such as were common many years ago. The use will be presented a window that looks like a calculator and be able to click on the buttons to get a result. I am providing the GUI, which is analogous to the outside cover and buttons of a real-world calculator. Your task will be to write the code for the internal workings, analogous to the electronics inside a calculator.
This will give you practice using objects to represent information, as well as designing the interaction between objects. This will also give you some practice working with action listeners.
After moving into your folder for this course, and making a folder for this project, copy the starter code given for this project:
cd 245
mkdir proj2
cd proj2
cp -r ~tvandrun/Public/cs245/proj2/. .
This will give you the following files and folders:
.classpath, a hidden file (you can see it only if you do ls -a that Eclipse will use for the project set-up; you you can ignore it
calc, a folder for a package containing the following files:
CalculatorFace.java, an interface defining how the internals
are to interact with the calculator's face
PlainCalculatorFace.java, the code for the GUI
NoSuchButtonException.java
SetUp.java, a class containing the main method
test, a folder containing JUnit tests to help you with
debugging.
Now open Eclipse and start a new project.
When the new project wizard comes up, give it a
reasonable project name, un-click "Use default location",
and point the location to the folder you made (for example proj2),
which contains the package folders calc and test.
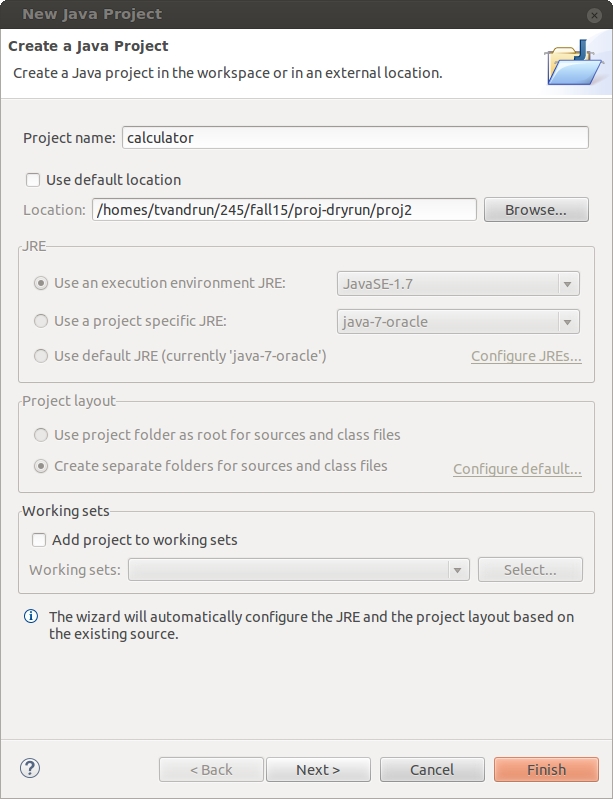
When you hit next, make sure you see a screen like the following. If it looks different (for example, having "src" and "bin" folders), then you've done something wrong.
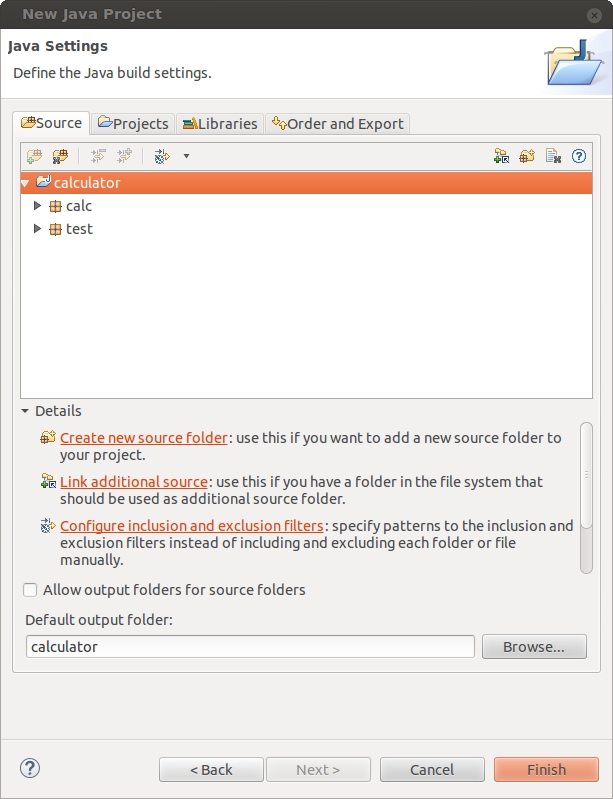
You can hit "Finish" now.
For more help on setting up a project in Eclipse, see this screencast demonstration of how to do it.
Open CalculatorFace.
As mentioned above, this is an interface defining how your
code will interact with the GUI.
It defines how to attach action listeners to the buttons
and how to write to the screen.
Its documentation tells you everything you need to know
about communicating between your code and the window.
The class PlainCalculatorFace, as mentioned above,
is a class implementing
CalculatorFace, that is, it makes/models the window.
You do not need to modify this class.
In fact, you do not need even to look at this class.
Again, the interface CalculatorFace gives you everything you
need to know to interact with this class or any other class that
implements the interface.
When we grade the project submissions we will not use
PlainCalculatorFace.
We will use another class that implements the interface.
If you work on this project on your own computer instead of the lab
machines, then there is one change you might make
to PlainCalculatorFace
so that
the window will appear correctly on another platform;
see the documentation in the file for details.
SetUp, action listeners, and calculator internalsYour task in the project has three parts:
ActionListener
interface that will be attached to the buttons and will be a bridge
between the calculator face and the calculator internals.
SetUp.setUpCalculator(),
which should initialize the calculator including connecting
the action listeners and internals to the calculator face.
If you haven't used the ActionListener interface
or don't remember it well enough, you can read the relevant sections in the
textbook (from chapter 17, particularly chapter 17.2), and look at the Java API.
Here's a quick review/overview:
An action listener is an object that is "attached" to a GUI component--
for example, a button.
Action listener classes implement the interface
ActionListener in the package awt.event,
which has the method actionPerformed(ActionEvent ae).
For our purposes, you can ignore the parameter (but don't let that stop
you from finding out how to use it, if you're curious).
In this project, you may want to make a PlusListener
class and attach an instance to the plus button on the calculator face.
When the button is pressed by the user, the method
actionPerformed()
is invoked.
For our present purposes, the actionPerformed()
methods will cause some change to the calculator internals
which will probably then be reflected on the calculator's screen.
Open SetUp.
You will notice the method setUpCalculator()
takes in a CalculatorFace---but not necessarily
a PlainCalculatorFace.
The code you add to this method presumably will
For example, if we suppose you have written a class PlusListener
that implements ActionListener and
handles the pressing of the plus button, you can attach an object to the button
by
face.addActionListener('+', new PlusListener());
The SetUp class has a main
method that instantiates a PlainCalculatorFace
and calls setUpCalculator.
You will use this for testing your calculator by hand
(as opposed to automated tested, described below).
So, to run the program from the commandline, use
java calc.SetUp
Or hit the "run" button for SetUp in Eclipse.
You may assume that your code will be used only
after being instantiated through SetUp.setUpCalculator(),
but you should not assume that it is called through SetUp.main().
The method SetUp.setUpCalculator() is public and
may be called from other code.
The intent is to make this program work "just like a hand-held four-function calculator." You can find a decent example for reference here. Don't try to implement anything fancy; don't use Ubuntu's built-in calculator as a reference.
Here are a few specific scenarios and what should happen (at least, what should happen in terms of the external behavior; what happens inside the calculator is up to you).
1 + 2 +
instead of 1 + 2 =, then the first operation is
executed, its result is shown on the screen, and that result is taken
as the first operand to the new operation.
Thus 1 + 2 + has the same effect as
1 + 2 = +
C resets the calculator
back to its initial state.
Examples:
| After button sequence... | ... the calculator screen should show |
|---|---|
| 5 | 5 |
| 51 | 51 |
| 12.5 | 12.5 |
| 12.5.3 | 12.53 |
| �15 | -15 |
| 1�5 | -15 |
| 15� | -15 |
| �15� | 15 |
| 1+2 | 2 |
| 1+2= | 3 |
| 1+2+ | 3 |
| 1+2=8 | 8 |
| 1+2=8-6= | 2 |
| 1+2=+4 | 4 |
| 1+2=+4= | 7 |
| 1+2+4 | 4 |
| 1+2+4= | 7 |
| 1+5C4+9= | 13 |
Whether integer results appear as plain integers (3)
or with a zero after the decimal point (3.0)
is up to you.
This doesn't cover all possible scenarios, of course. Part of this assignment is for you to think through what the user might do and how the calculator should behave in those circumstances. Feel free to ask me questions like "What should happen if....?"
Important: The "screen" on the calculator is only 15
characters wide.
Java displays double numbers using more than 15 characters.
Make sure that when you display results that you do not run off the end
of the screen.
You need to think about how to format your results.
There are several ways to do this.
One way is to use the DecimalFormat class;
it's described in Absolute Java (check the index, pages
differ with edition) or
the
Java API.
You also can devise your own formatting strategy using String
manipulation.
Also, be sure your code is documented according to the specifications given in the style principles.
Finally, as has been mentioned in class, this is a point where many students realize they never understood what the static parts of a class were all about---which usually stems from having not yet mastered the concepts of class and instance. So if something is wrong and Eclipse suggests you make some variable static, don't do it. Something else is wrong; ask for help if need be. Specifically, any static variable must include in its documentation an explanation why that variable is static.
This is the time of the semester when I get to know students in this class, because so many of them show up at office hours wanting help on this project. You are warmly invited to stop by for help, but here are things you should think about before that conversation:
There are two basic strategies for using action listeners:
Either you can write very busy actionPerformed() methods,
which do a lot of the actual work of the calculator themselves;
or you can write simple actionPerformed() methods
which merely call another method in a central object.
The choice between these is up to you, though that doesn't mean
they're equally good options.
As we go on this semester, we'll discuss
some of the trade-offs in a decision like this,
and at this point you should try to use the principles and examples
we've seen so far to make as good a design as possible.
Don't confuse the calculator's screen with the calculator's memory or state. The screen is used to show the user a result or the operand the user is currently entering. It is not supposed to show everything that is going on inside the calculator, and it shouldn't be used to store information. That's the job---or, one of the jobs---of the calculator internals.
Don't confuse the event of an operation button (such as plus) with the actual operation happening. When the user presses the + button, the calculator doesn't even have the second operand yet. The action listener on the plus button isn't supposed to do addition. Instead it should cause an addition to be stored as a pending operation, to be done later.
Don't try to write this entire project at once. Start implementing the number buttons first, making numbers appear on the screen. Then implement the plus button. When that's working, start doing the other operator buttons.
Test your calculator "by hand" by running it through calc.SetUp.
Additionally, I have provided some JUnit tests that will exercise
how well your calculator handles some of the scenarios described earlier.
Run these tests by running test.TestCalcBasic
as JUnit test.
You may inspect these tests and add your own. Here's how they are set up:
    @Test
    public void addEq() {
        testSequence("1+2=", new String[] {"3", "3.0"});
    }
The first parameter to testSequence(),
the string "1+2="
indicates a sequence of buttons pressed on a newly initialized calculator.
The second parameter is an array of strings indicating the
set of acceptable results that could be on the screen after
that sequence of buttons.
In this case, the test will pass if either 3
or 3.0 is on the screen after the
given sequence of buttons were pressed.
The test cases given do not represent all the tests your submitted project will be graded against. We will run your submission against a wider range of tests; you should test it more thoroughly too.
Please turn in all the files you wrote or modified (ie, the files you didn't modify don't need to be turned in) to a turn-in directory. To turn in a specific file, do
cp (some file) /cslab.all/ubuntu/cs245/turnin/(your user id)/proj2
To turn every file in whatever directory you are currently in, do
cp * /cslab.all/ubuntu/cs245/turnin/(your user id)/proj2
DUE: 5:00 pm Friday, Oct 9, 2015, 5:00 pm. Note that this is also the due date of Project 3.
Clarification of late day policy: The syllabus indicates that students have two late days for projects over the course of the semester---either one project two days late or two projects each one day late. It does not address how weekends days are counted. Here's the deal: If you use late days on a project over a weekend, you have the entire weekend to finish that project, but it consumes both of your late days. That is, if you haven't used any of your late days, you may turn in either Project 2 or Project 3 late (by Monday, Oct 12), but then all of your late days are expended (even if you turn it in on Saturday).
Getting your calculator to work perfectly right is actually pretty hard to do. Even the best students rarely get full marks on the first try of this project. (A later project will revisit this problem.)
Grading for this project will follow this approximate point breakdown (the right to make minor adjustments in point distribution is reserved):
Design and style are weighted disproportionately low in the grading of this project, since you are just learning how to design systems. The relative weight of design and style in the grading of projects will increase as the semester goes on.