For general help on connecting to Wheaton's computers from off campus, see Computer Science Lab Remote Access from answers.wheaton.edu
For getting starter code on your own computer and turning in your
projects and practice problems, the best way is to use secure copy
(scp).
On a Mac, this is already built in; just use the scp command from the
terminal.
On Windows, you'll need to get an scp utility
from
the same people that make PuTTY called pscp
(that is, PuTTY secure copy).
As described again below, the way to get the starter code for, as an example, the adt-review project, do
scp -r (your id)@csgate.wheaton.edu:~tvandrun/Public/cs345/adt-review .
To turn files in from your computer (for example,
ArrayMap in the adt-review project, do
scp ArrayMap.java (your id)@csgate.wheaton.edu:/cslab/class/cs345/(your id)/adt-review
On Windows, these commands should have pscp
instead of scp.
This page contains information and hints for working on projects in CSCI 345. The basic rules as laid out in the syllabus allow for students to collaborate and to work at their own pace (the only hard deadline for all projects is the end of the semester), but students are not allowed to use outside resources (books besides our textbook, or anything on the internet) for these projects.
For the convenience of those of you who use Schoology to keep track of assignment due dates and such, I have made an "assignment" on Schoology for all of the projects. They each contain a link to the project itself. The "due date" listed for each project is the date I recommend having the project done by in order to keep up with the course.
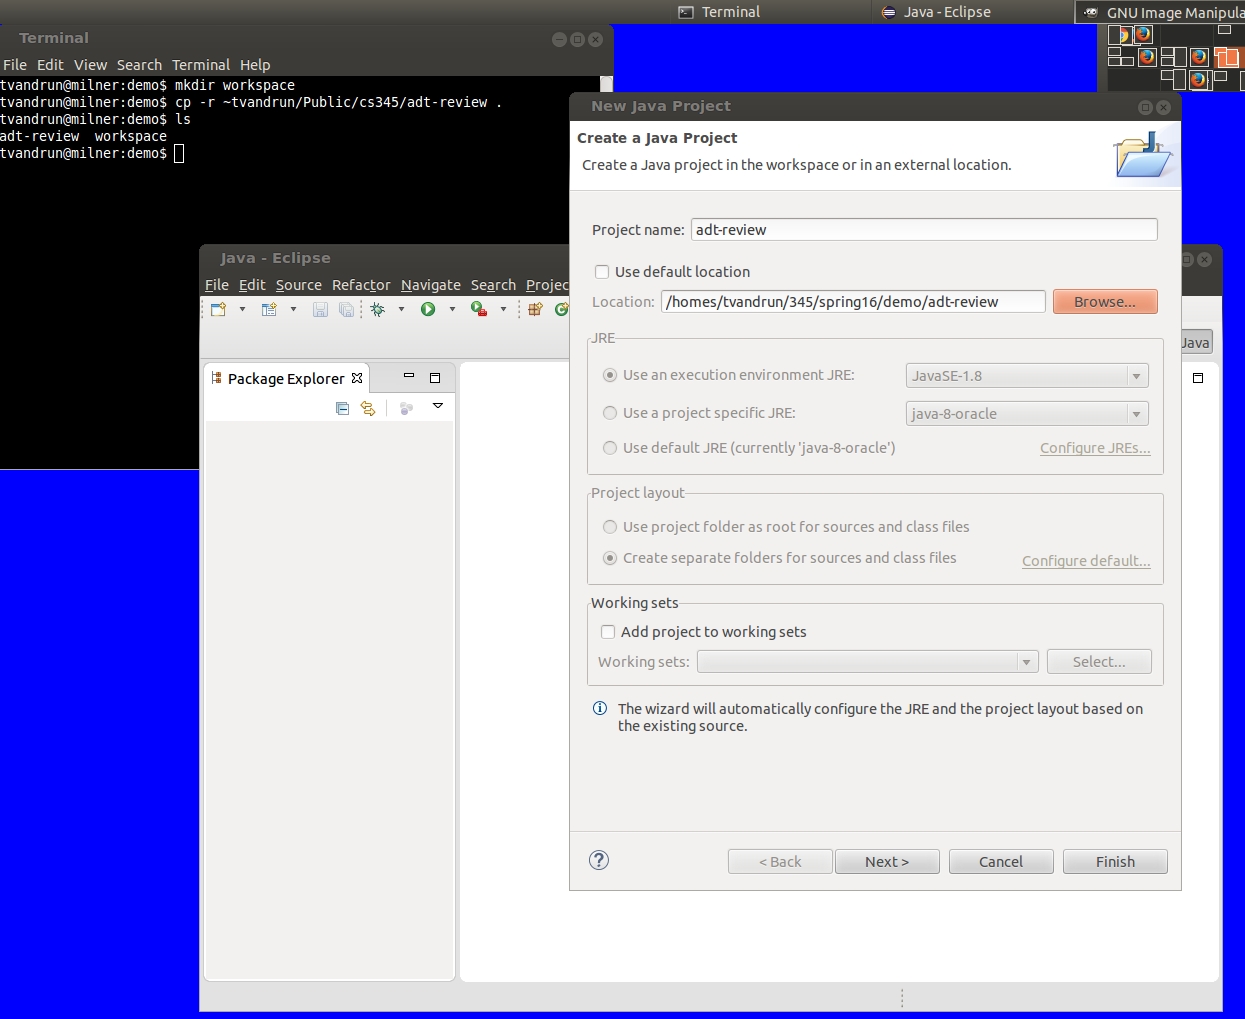
I recommend you make a folder in your account for this course and in that folder make an Eclipse workspace just for projects and such in this course. Let's suppose we're going to work on the ADT project. Go to the folder where you are keeping your projects. You can copy the starter code for the project in one of two ways. You could first make a folder for the project (which you can name whatever they want) and then copy the starter code into it, say
mkdir basic-adts
cd basic-adts
cp -r ~tvandrun/Public/cs345/adt-review/. .
The -r indicates that folders, not just individual files,
should be copied (otherwise folders are skipped).
The . at the end of the source
(~tvandrun/Public/cs345/adt-review/.)
indicates that hidden files also should be copied.
This is important because
the starter code will come with a .classpath file
that contains important information for the project set-up.
Alternately, if you plan to use the same name for the folder of this
project as I do (in this case, adt-review), you could skip
the steps where you make a new folder and simply copy the whole folder:
cp -r ~tvandrun/Public/cs345/adt-review .
If you are working on your own computer, you can do either of these approaches using the scp command or something equivalent. From the terminal in either Mac or Ubuntu (I don't know what the equivalent is on Windows), just do
scp -r (your id)@csgate.wheaton.edu:~tvandrun/Public/cs345/adt-review .
The folder for the project contains several folders which
correspond to Java packages.
Usually there is adt,
impl, and test,
for interfaces (defining abstract data types), classes implementing those
interfaces, and JUnit tests, respectively.
On some projects there are such packages as alg
for stand-alone algorithms and exper for
experiments.
I hope you're competent in making Eclipse projects by now....but my experience tells me that students at the end of Programming II still ocassionally find themselves in an Eclipse bind, and for some of you it may have been over a semester ago that you last used Eclipse. So, follow these steps. Launch Eclipse. Select the workspace folder that you're using for this course. Make a new project.

You can name the project anything you want, but you'll probably be less confused if you give it the same name as the folder containing the project. Now, here's the part that always messes people up: Make sure you uncheck "Use default location" and put in as the location the folder containing the packag folders, as you can see in the example above. When you hit "Next>", you should see something like this:

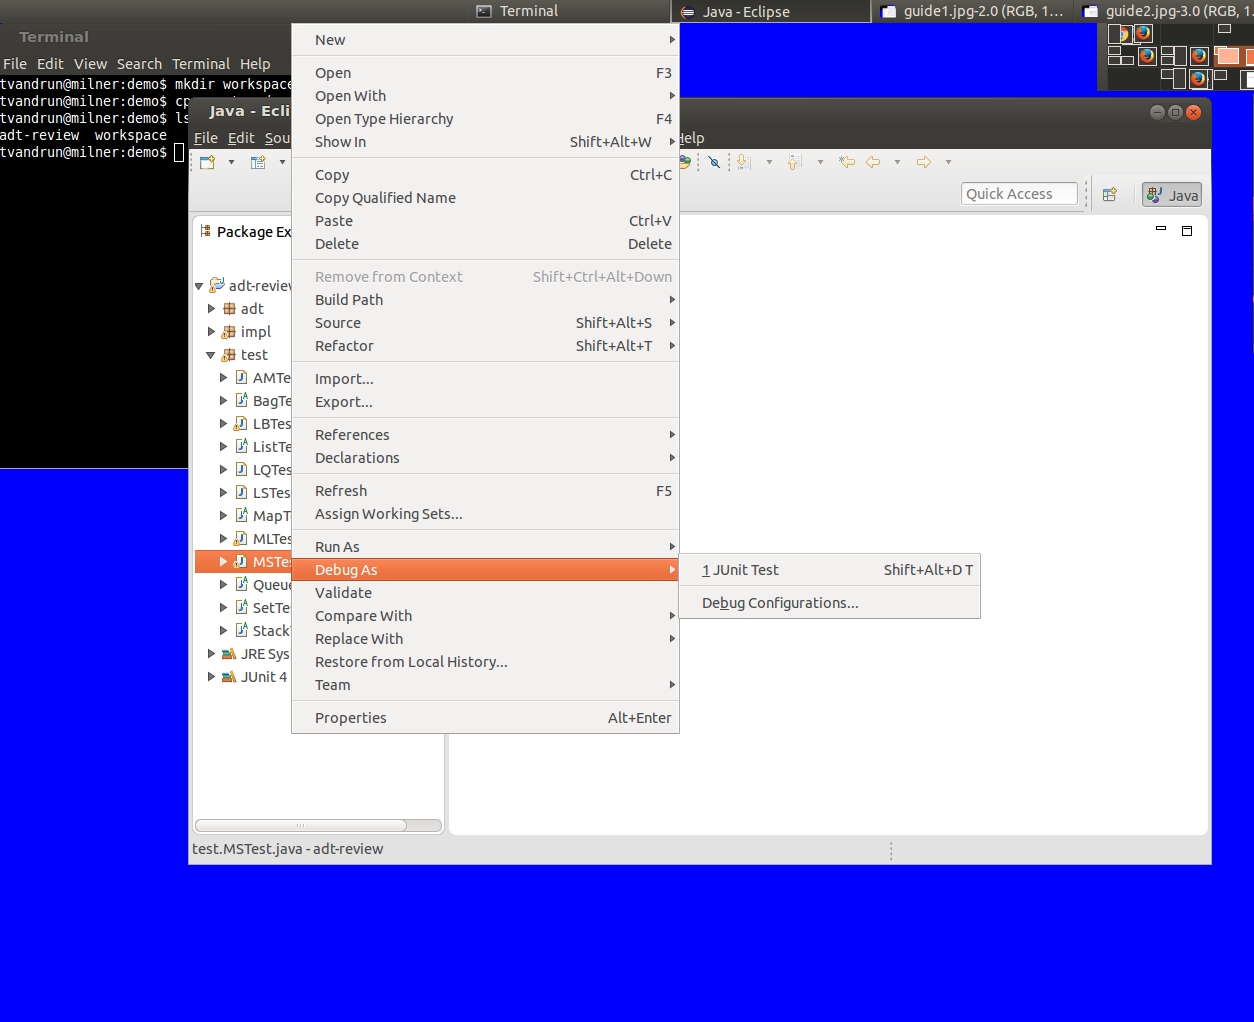
You should always run the appropriate JUnit tests before you work on the part of the project they test; verify that most of them fail. You don't have to open a test to run it; simply right-click on it and select "Run as->JUnit test".

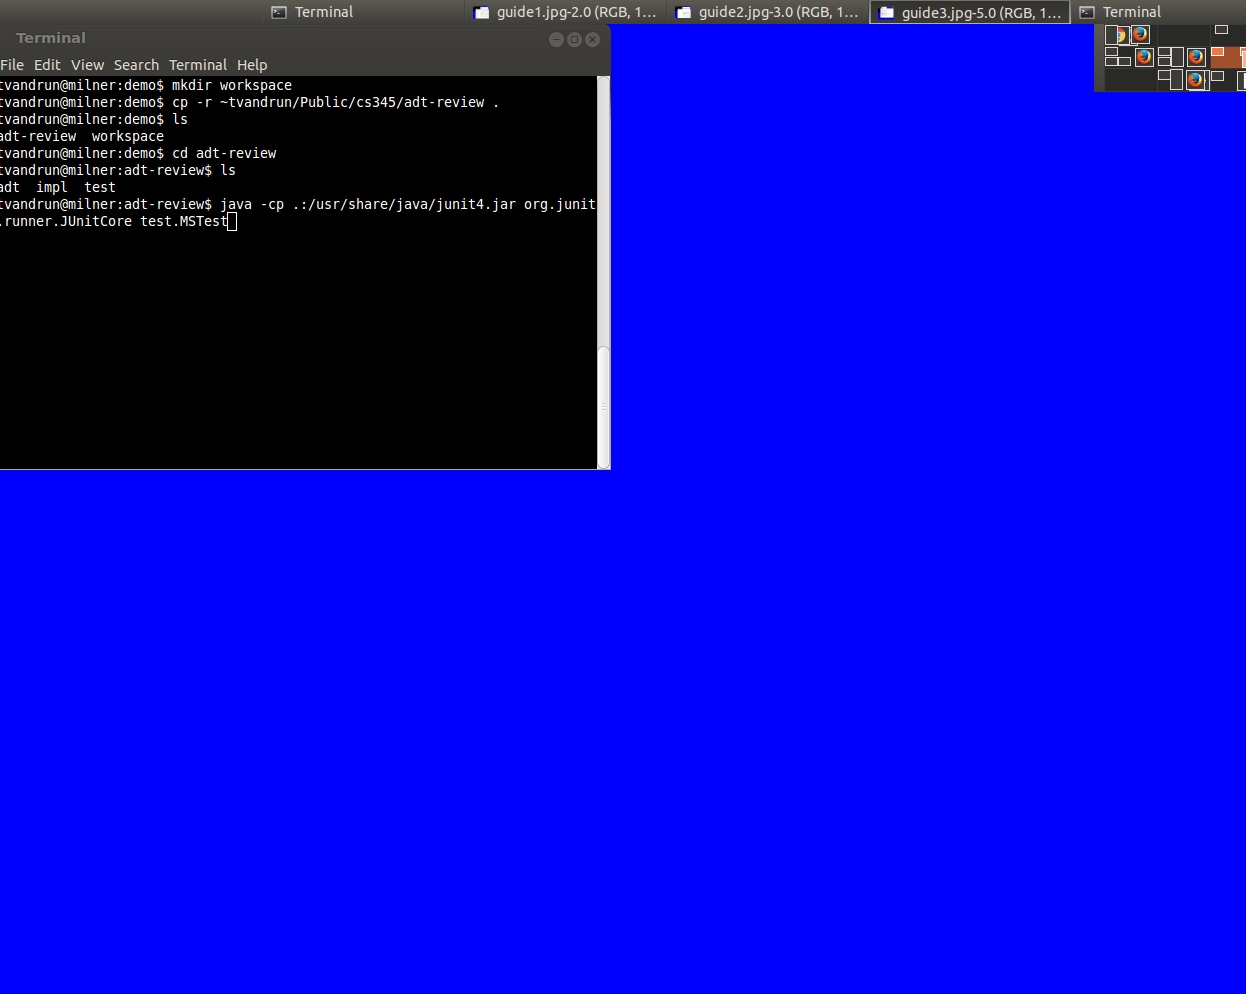
Fine. You can run JUnit tests from the command line. It takes a special incantation, however. Use
java -cp .:/usr/share/java/junit4.jar org.junit.runner.JUnitCore test.(name of test)

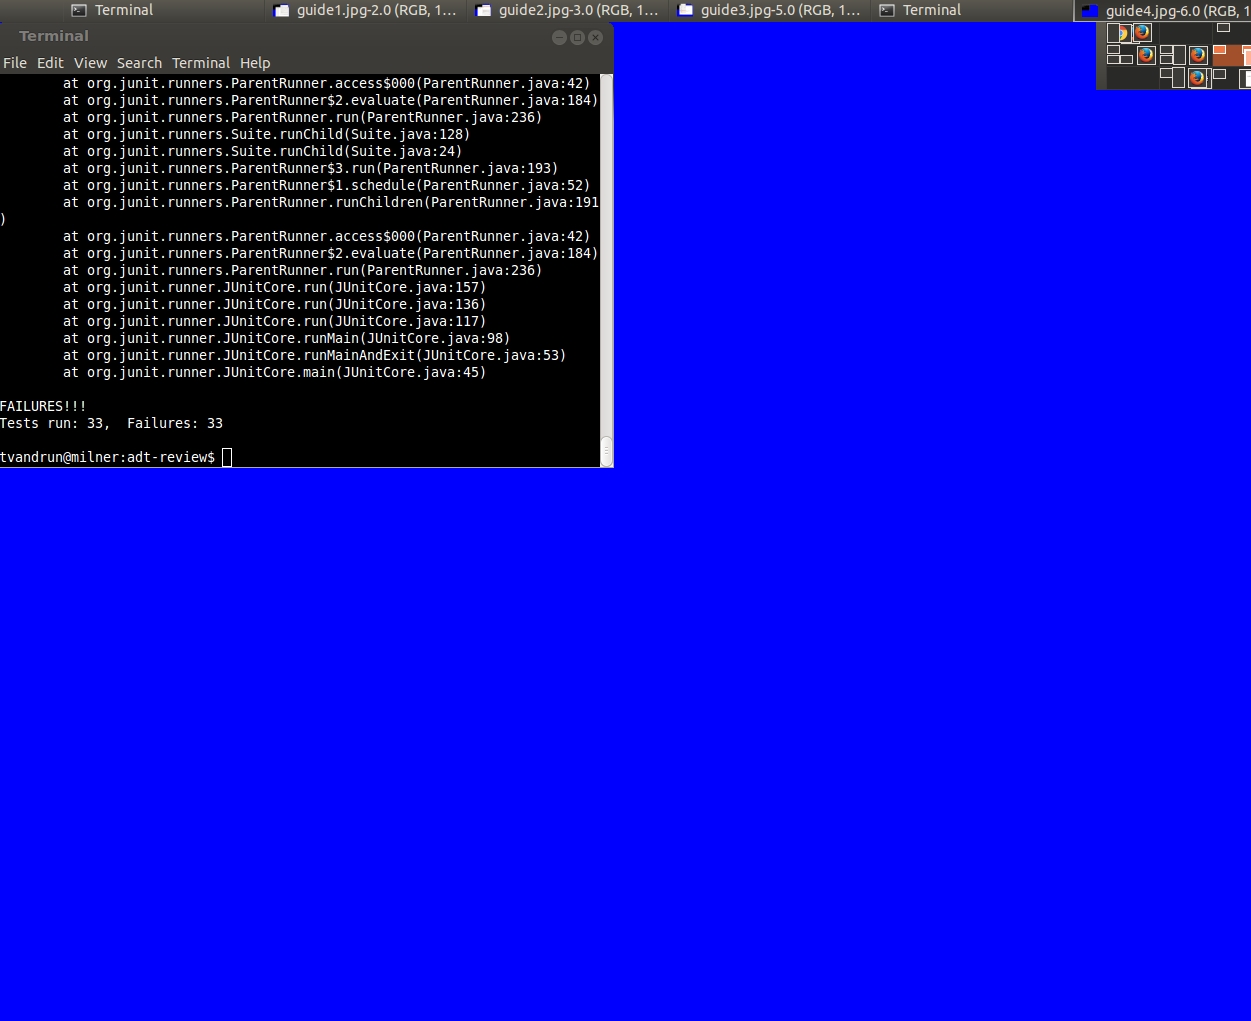
Be prepared for a screenful of errors, though.

Also, I recommend you become familiar enough with Eclipse that you can use it when you need to. The programming portions of the tests, for example, will require you to use Eclipse.
By giving you lots of starter code, documentation, and especially the JUnit tests, I intend to give you the conditions in which you can focus on the new ideas and get instant feedback on whether you're on the right track.
Unfortunately I've also given you the conditions that would tempt you to work on the projects by randomly fiddling with the code until the tests pass. DON'T DO THIS. Resist the temptation. If your code doesn't pass the tests, you need to think about why your code fails. You need to debug your code by reasoning through your code.
Each project has turn-in instructions, but for almost all of them you are simply asked to copy a few files that you have modified. Please copy only the files asked for, and copy them only to the folder indicated. Please don't turn in .class files, files that you haven't modified, whole folders, etc.